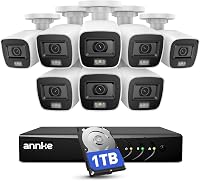
How to Install a DVR Security Camera System
To install a DVR security camera system, mount each camera with its view clear of glare and obstacles, run cable from each camera back to the DVR, then connect the DVR to a monitor and set a recording schedule. Power the system last and confirm every channel shows a live picture before you close the walls.
On this page (9 sections)
- How should you plan the layout before you drill?
- What tools and parts do you need?
- How do you mount each camera in the right spot?
- How do you run cable from each camera to the DVR?
- How do you set up the DVR and storage?
- How do you connect the DVR to a monitor or TV?
- How do you check the picture and finish the setup?
- How does a DVR system differ from an NVR or Wi-Fi setup?
- What should you do first on install day?
To install a DVR security camera system, mount each camera with its view clear of glare and obstacles, run cable from each camera back to the DVR, then connect the DVR to a monitor and set a recording schedule. Power the system last and confirm every channel shows a live picture before you close the walls.
The order matters more than the gear. Most problems during how to install DVR security camera system projects come from mounting first and planning cable runs later, so sketch the layout before you drill anything.
How should you plan the layout before you drill?
Draw the camera positions and cable paths on paper first, then check each spot against real light and obstacles. A plan saves you from re-running cable after the first camera is up.
Walk the property at the time of day you care about most. Note where the sun sits during evening hours and where porch lights or streetlights throw glare.
Place cameras so each one looks down a path or doorway rather than straight across it. Mark the DVR spot near an outlet and near where you can reach it for maintenance.
Measure each planned cable run and add a little slack at both ends. Write down the camera count so you can match it to the recorder's channels.
What tools and parts do you need?
You need a drill, mounting screws, a cable route, and a monitor or network connection for setup. A helper and a ladder make the high spots safer and faster.
Gather a drill with bits for your wall material, a screwdriver, a pencil, a ladder and cable clips. Have a monitor with HDMI or a network cable ready so you can see the DVR during setup.
Plan how the cable will leave the building. A small hole behind the camera and a matching one near the DVR keeps runs tidy, and you can seal both with exterior-grade caulk.
How do you mount each camera in the right spot?
Mount each camera high enough to be out of easy reach, angled to cover the entry or path, and pointed away from strong light. Height and aim do more for picture quality than any setting.
Set the camera housing on the wall, mark the screw holes with a pencil, and drill pilot holes. Attach the base firmly, then leave the tilt and swivel loose until you can see the live image.
Aim each camera before you fully tighten it. Check that the view covers the doorway or drive and leaves the sky out of frame.
Avoid pointing a camera directly at a lamp, a security light or the setting sun. Stray light washes out the picture and makes faces hard to read.
How do you run cable from each camera to the DVR?
Run one cable per camera from the mount back to the recorder, keeping the path dry, clipped and away from sharp edges. Neat runs are easier to test and easier to fix later.
Feed the cable through the wall hole behind the camera and clip it along the exterior wall or tuck it under trim. Bring all runs to a single point near the DVR so the install stays organized.
For a plug-and-play PoE kit like the Reolink RLK8-800D4, one network cable carries both data and power. Its cameras connect over cable runs up to 330 ft, so measure your longest run against that figure.
If a run must go underground or across a long stretch of yard, a direct burial cable is the right part. Its LLDPE jacket resists water and UV, so you can bury it without conduit and skip a messy above-ground run.
Leave a loop of slack at each end so you can move the camera or pull the DVR forward later. Seal the wall holes with caulk so rain and insects stay out.
How do you set up the DVR and storage?
Connect the cameras to the recorder's ports, then connect the DVR to your monitor and follow its startup setup. Do this with the cameras already mounted so you can aim each one on the live feed.
Plug each camera cable into its numbered port on the back of the DVR. Connect the DVR to your monitor with HDMI and plug in a mouse for on-screen navigation.
Power the DVR last, then let it find the cameras. Follow the on-screen startup to set a password and the date and time.
The Reolink kit comes with a pre-installed 2TB hard drive and records 24/7 with H.265 compression. Its NVR supports 8 channels and storage can be expanded.
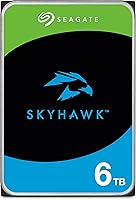
If you plan to keep more days of footage or run more cameras, a surveillance-grade drive is the part to upgrade. The Seagate SkyHawk 4TB is built for DVR and NVR systems, with a 180TB-per-year workload rating.
Set a recording schedule you'll actually use. Continuous recording catches everything; motion-only recording fills the drive more slowly.
Our guide to the best hard drive for a security camera system covers storage choices in more detail.
How do you connect the DVR to a monitor or TV?
Run an HDMI cable from the DVR to a monitor or TV, then switch the screen to the matching input. This is the fastest way to see all cameras at once and finish the setup.
A TV in a living room or office works as well as a dedicated monitor. Keep the DVR where you can reach its mouse and ports without climbing behind furniture.
Our walkthrough on how to watch security cameras on a TV covers input switching and multi-camera layouts. Once the picture is up, use it to check each camera's aim and adjust the angle before you tighten the mount.
How do you check the picture and finish the setup?
Walk past every camera and confirm the live feed shows faces and details clearly, then set motion alerts and close up the install. Testing now catches a bad angle before it becomes a habit.
Check each channel in daylight and again at dusk. Look for glare from lights, a view blocked by a plant or bin, and any camera that clips the doorway.
Adjust the camera angle and the motion zones so alerts come from the areas that matter. Set the frame rate and resolution to the level your storage can sustain.
Seal the wall holes and tidy the cable clips. Label each cable at the DVR end so a future repair or camera swap takes minutes, not hours.
How does a DVR system differ from an NVR or Wi-Fi setup?
A DVR usually works with analog cameras and coax cable, while an NVR works with IP cameras and network cable. Many modern kits labeled as DVR-style recorders are plug-and-play network recorders, so check the camera type before buying cable.
A Wi-Fi camera setup needs no long cable runs but depends on strong wireless signal at each spot. A wired DVR or NVR kit trades that cable work for a steadier connection and continuous recording.
The Reolink RLK8-800D4 is a PoE network kit, so its cameras use network cable rather than coax. Match your cable type to the recorder you buy.
For a plain-English overview of how the parts fit together, see how a security camera system works.
What should you do first on install day?
If you're wondering how to install a DVR security camera system without wasted effort, plan the runs and test one camera before mounting all four. Power the DVR and one camera on a short cable first, confirm the picture, then commit to the wall.
Choose the Reolink kit if you want a complete 4-camera 4K system with a pre-installed drive. Add the direct burial cable when a run goes through the yard, and the Seagate drive when you want a longer footage history.
Mount the recorder near power, run the cable neatly, and aim every camera on the live feed before you finish.
If you want pan-and-tilt coverage on a wide driveway or yard, compare a PTZ security camera system before you buy the kit.
Frequently asked questions
How long does it take to install a DVR security camera system?
Allow about half a day for a four-camera kit if the cable runs are short and you already have a drill. Long outdoor runs, conduit, or a second person on a ladder add time, and the setup and testing at the end usually takes another hour.
Do you need internet to install a DVR security camera system?
No. Local recording and live viewing over a monitor work without internet.
Internet is only needed for remote viewing on your phone or computer, so you can mount and test the whole system first and add the app connection later.
Can you install a DVR system without drilling?
Sometimes. You can clip cable along siding, tuck it under trim, or use adhesive mounts on flat surfaces.
Cameras still need a firm fixing point, so drilling is the normal route for a secure outdoor mount.
What should you check before you start the install?
Check the camera count against the recorder's channels, the cable length against each planned run, and the recorder's storage against how many days of footage you want. Confirm you have power near the recorder and a monitor or network connection ready for setup.